
I took a 20 year old gray metal lamp and wanted to update it for my living room. I don't like how it went on streaky and splotchy.

Is this ugly or what?

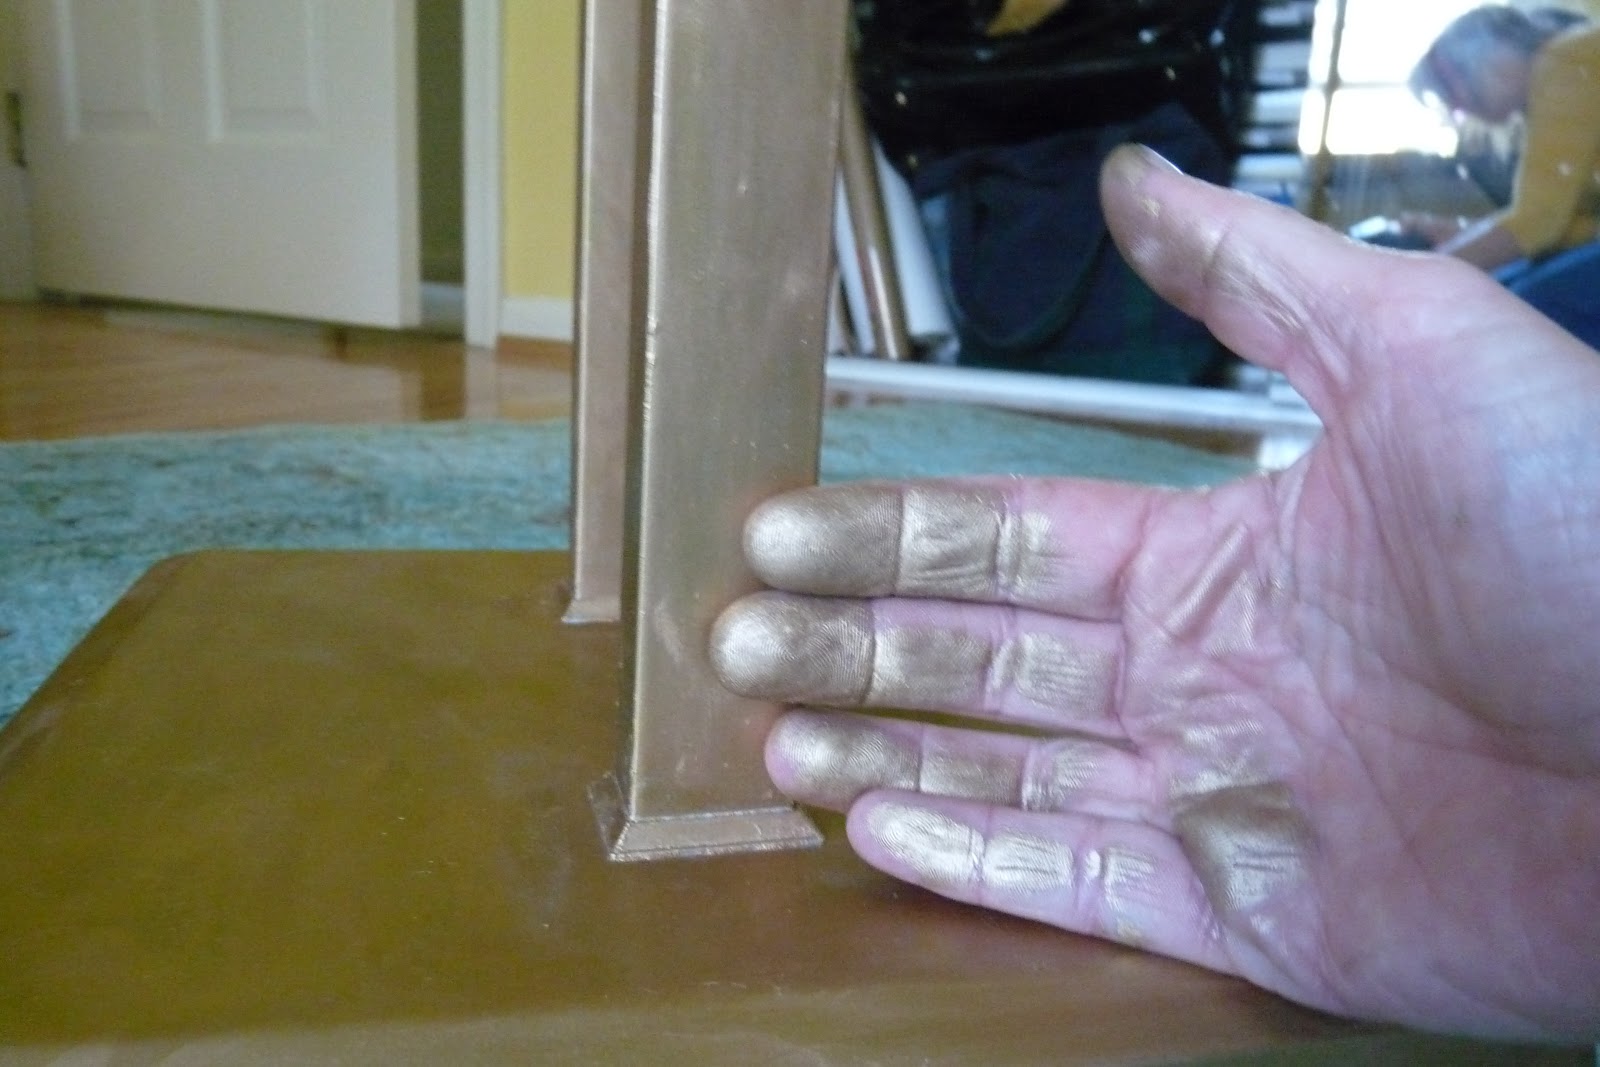

A tube is suggested to cover 20 square ft. I used this much on one floor lamp.

It did finally cover fairly well after 4 coats on the base and one thick coat on the shade. I guess the trick is to apply it liberally; at least in this case. I spray painted the inside of the shade gloss black, just because.
Next problem was the gold we bought online had a number on the tube. The RnB at Michael's didn't have numbers on it, so I bought a selection of golds and ended up applying the antique gold, which is a mistake I think. Here is the lamp thus far. That color is too tan looking for me.

Next try is to make the shade a mix of gold and silver, Bethany calls Gliver. It is too tan looking as it is right now I think.. Stay tuned for the continuing saga.

What a minute, it doesn't look too bad in the photo...hmmmm.

Word to the wise: DIY's don't always turn out as planned, right? A huge dose of patience is needed along with your materials, and perseverance! I wanted to add a touch of glam to that corner, and I think I added a touch of SLAM.
On another note, my juices were flowing this week as I constructed a copper wire figure of a yoga pose for the yoga studio we just completed. This 'down dog' is about 3' x 4' and will go on a wall in the studio. I'm working on another 'tree' pose also.
The process involved making a drawing first and bending the wire in a continuous line around the drawing, like a "contour"drawing". Then I took a smaller gauge copper wire and tied in some details. It was very tricky getting that thicker wire to cooperate but I think it turned out as expected.


Today we revisited our fabulous yoga client to begin planning for her office makeover! The overwhelming and fantastic response to the studio makeover has reaped many benefits!
Any Rubn'Buffers out there who want to offer some advice? Help!
Nancy
If you are looking for help with your home, we'd love to work with you! Contact us for a listing of our services and prices. Nancy and Bethany


Nancy-
ReplyDeleteWorking with Run n Buff can be tough. I have started guilding the piece and adding the rnb afterwards, which is a lot of trouble. Maybe I just haven't been adding enough.It looks good in the picture though.
The copper wire piece is amazing! I love it!
Good luck on the offense. I know that it will look great.
Happy Wednesday.
Teresa
xoxo
I have never used Rub'n' buff. I don't think I want to try. Your wire figure is marvelous!
ReplyDeleteI have shied away from RnB for exactly this reason. I feel sure I will mess it up! You are one talented lady!
ReplyDeleteI have always been scared of Rub 'n Buff. I admire you for trying it. :) And I love your wire figure!!
ReplyDeleteI am not laughing at you, just laughing with you! I love it when others share their DIY mess ups.. .makes all of us feel normal! And the copper wall hanging is fantastic!!!
ReplyDeleteI've had my issues with R'n B, too! I've only tried it in small doses, I'm impressed you went for something big. The wire sculpture is fabulous!
ReplyDeleteI really like that wire figure! What a neat idea. As for the lamp...I say get the spray paint! If you get the 24kt gold spray paint it gives an ultra shiny appearance. I used it on my bar cart and am happy with the result.
ReplyDeleteI thought it was my age! Eons ago I had huge successes with Rub n Buff! My last experience was horrible! I'm trying to transform a shinny gold (1970'ish) light fixture. Bought two different colors, antique gold and bronze. Tried the antique gold first. Will return it on my next venture to Hobby Lobby! I used the bronze. Had the same result as you did on your first attempt. It just didn't go on right! Not like I remember it working before. And the color....that bronze is too dark and looks black! The whole idea of Rub n Buff is supposed to be, fast, easy, quick transformation! MC will spray paint it after all!
ReplyDeleteI have a mirror I'm wanting to redo with Rub and Buff. After reading this, I'm rethinking. If you're having trouble, I will have a complete and total disaster. Your yoga piece is incredible!
ReplyDeleteThe old rub n buff...I didn't know they even made it anymore until about a month ago and I used on a few projects around here..like some frames, mirrors..very small and I loved how it turned out! But again..small projects. Maybe spray paint gold first and then rub n buff?
ReplyDeleteMan that is a clever idea on the wire form! I might give that one a whirl!
I just bought some and love it! So easy to use...
ReplyDeleteRub n buff and gold leaf scare me. I will stick to spray paint. The wire figure is amazing!
ReplyDeleteWait I thought rubnbuff was supposed to be easy? I was planning to do some dull hardware with it but now I'm not so sure. Impressed with your copper art so that's a victory!
ReplyDeletewww.chattafabulous.blogspot.com
p.s. the lamp really looks good in the photo!
Hi Nancy~
ReplyDeleteI haven't had much success with RnB, either.
I save it for small things or hardware.
I was about to try it on a leather table top, but maybe should reconsider.
Hmmm.
Your wire sculpture is amazing!
SERIOUSLY IMPRESSED by your iron sculpture (and the drawing is pretty fab too)!!!
ReplyDeleteLove that Yoga wall art you made - looks so professional Nancy!!!!! As for the lamp, yes, I've had experience with things not going as planned for my DIY projects, but never tried RnB ever! I think it is a little bit tan and GLIVER might do the trick (hey put a patent on that word, May become the next "it" word in design)! Good luck dear!
ReplyDeleteLove that yoga art :) I always admire the stitching art! I once met an artist who told me that you have to let accidents happen in order to create the best work- I think that applies to DIYs too!
ReplyDeleteThe copper wire figure is amazing!!! You are so good!!! I've been making stuff gold around here too! I guess it's going around ;) I've never used rub n buff before, so I don't have any advice. But I think your lamp looks really pretty in the photos!
ReplyDeleteI love the yoga sculpture. I could not figure out how you were going to do it. Brilliant idea. As for the lamp, we've all been there....sometimes you win, sometimes "it" wins.
ReplyDeleteLove the yoga sculpture...look forward to seeing the other one. Sorry to hear about your rub and buff experience. I've had it work for me, when using it to highlight pieces. I used a rag and my finger. The lamp looks great in the photo though!!!
ReplyDeletewww.donnaviningblog.com
Way to persevere with the R&B! I love the end result. Your lamp looks great!! Sometimes the R&B wax doesn't take to the finish on shiny metal…..I like to rough up those surfaces with a bit of fine sandpaper first. Thanks for sharing in the R&B Anthology!!!
ReplyDelete